$0.00


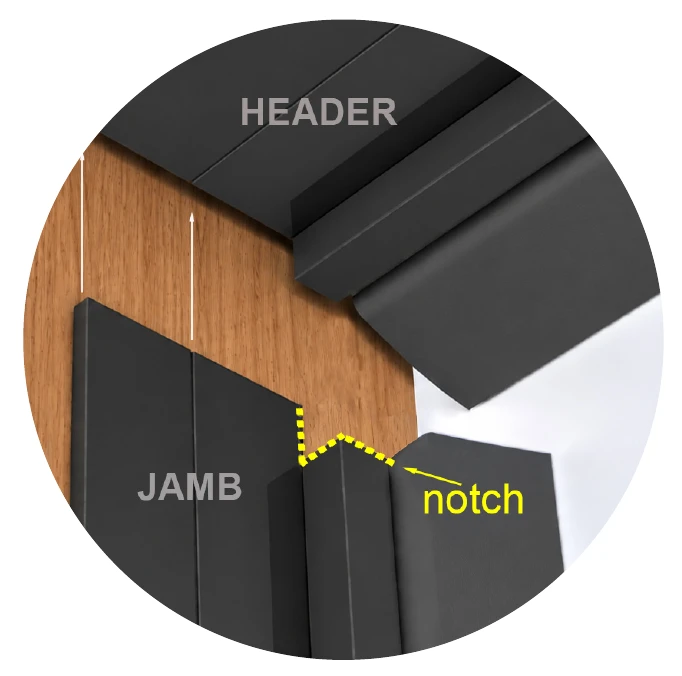
Install the Top (Header) Piece first, then the two Side Pieces. Use the screws provided. Note: some extrusion lengths come pre-notched.
⬇ Download printable instructions (PDF)Part 1: Top (Header) Piece
1
Prepare and cut to length
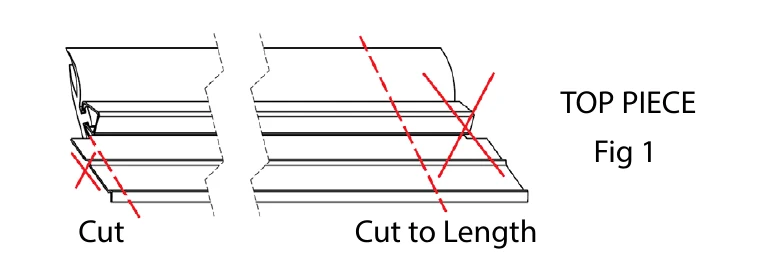
Cut a tab off the aluminum only, on one end. Measure the header, transfer the measurement to the retainer, and cut the Top Piece to length. Fig 1
2
Cut back and center the vinyl
Pull the vinyl from one end and cut back about 3". Then center it so it sits an equal distance from each end. The vinyl will be stretched during installation.
3
Center screw first
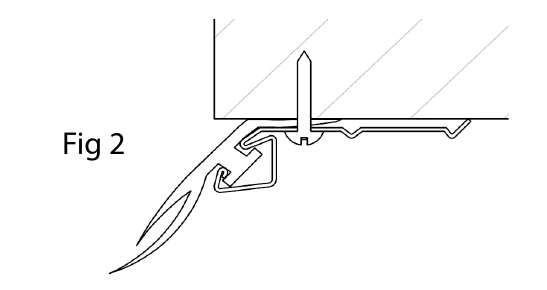
Using the screws provided as shown, install the first screw at the center of the header. Fig 2
4
Stretch to each jamb
Stretch the vinyl to the jamb and drive a screw to lock it. Repeat on the other end.
5
Finish the screws
Install the remaining screws, spaced about 24" apart.
Part 2: Side Pieces
6
Cut from the bottom only
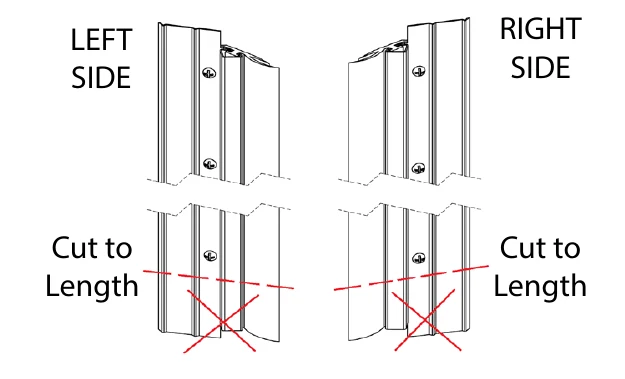
The Side Pieces have a notch at the top and bottom. Cut to length from the bottom only, so the notch stays at the top. Cut one left and one right. Fig 3
7
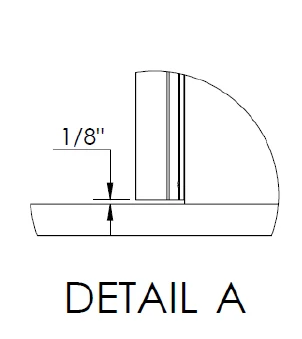
Set the floor gap
Cut to leave a 1/8" gap between the bottom of the Side Piece and the floor. Detail A
8
Trim the vinyl at the notch
At the notched end, pull the vinyl forward 3", cut it square, push it back into the retainer, and line it up with the notch.
9
Top screw first
Install the first screw at the top (notched end) of the Side Piece.
10
Stretch to the floor
Stretch the vinyl down toward the floor and drive a screw at the bottom to lock it.
11
Screw at each section joint
On each side, add one screw where each door section meets. Each side should have a screw at the top, the bottom, and every section joint.
12
Check the corners
The Top and Side Pieces should fit together in the corners as shown.