$0.00


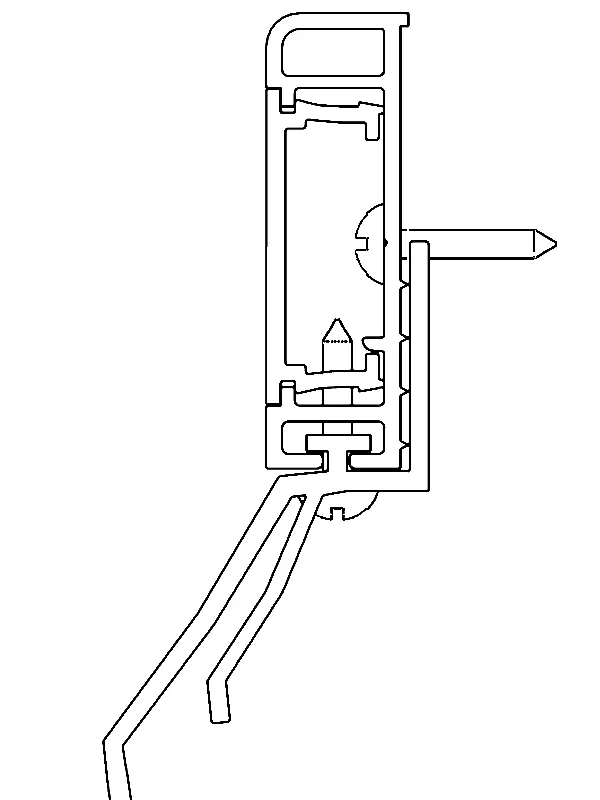
SR-1104 has three parts that work together: the cap, the retainer and the fin seal. Install the header first, then the two side seals, then snap the caps back on and fasten them.
⬇ Download printable instructions (PDF)Part 1: Header
1
Cut the header to size
Measure across the top of the door opening and cut the header piece to length.
2
Pin the fin and install screws
Pin the fin seal so it can’t shift in the retainer, then install the screws to fasten the header in place.
3
Snap the cap back on
Press the cap back onto the header retainer until it snaps in, working along the full length.
Part 2: Side Seals
4
Cut the side seals to size
Measure the jamb height and cut each side seal to length. Repeat for the opposite jamb.
5
Pin the fin at top and bottom
Pin the fin seal at the top and at the bottom of each side seal.
6
Install screws in the retainer
Drive screws through the retainer to fasten each side seal to the jamb, working down its length.
Part 3: Snap the Caps On and Fasten
7
Snap the side caps on
Insert the cap by pushing it straight into the jamb until it snaps onto the retainer.
8
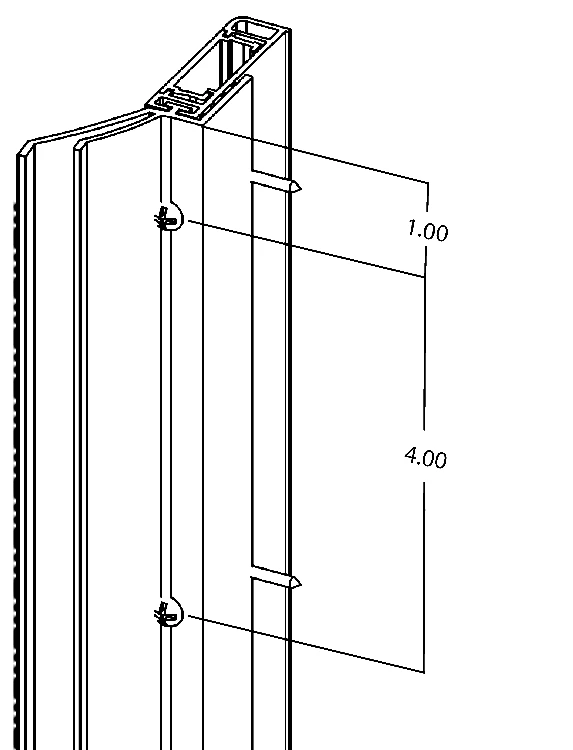
Cap screw 1: 1" from the top
Using #8 or #6 self-drilling screws, fasten the first screw through the flex, 1" down from the top.
9
Cap screw 2: 4" below screw 1
Fasten the next screw 4" below the first screw.
10
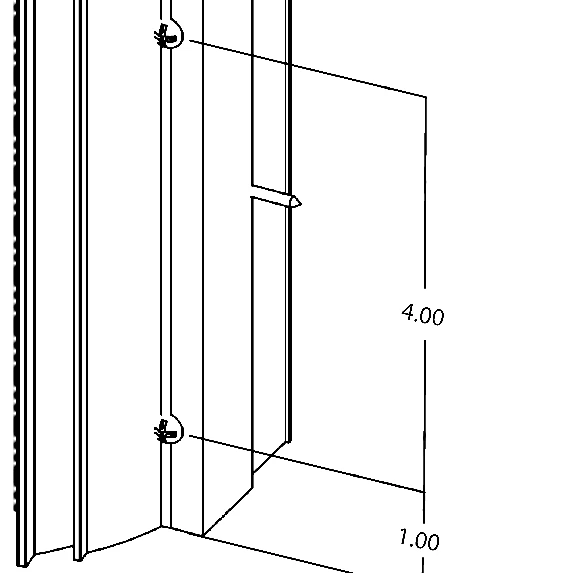
Cap screw 3: 1" from the bottom
Fasten the third screw 1" up from the bottom.
11
Cap screw 4: 4" above the bottom screw
Fasten the last screw 4" above the bottom screw.
12
Repeat on the other side
Repeat steps 7 to 11 on the opposite side seal. Each side should have 4 cap screws.
Why the cap screws matter: they’re optional but recommended. Without them, the cap can shrink in high heat, such as with dark-coloured weatherstrips, aluminum-clad jambs or dark aluminum jambs. The screws also stop the flexible part of the weatherstrip from creeping up or down.
Storage: please do not leave weatherstripping in polybags exposed to the elements.