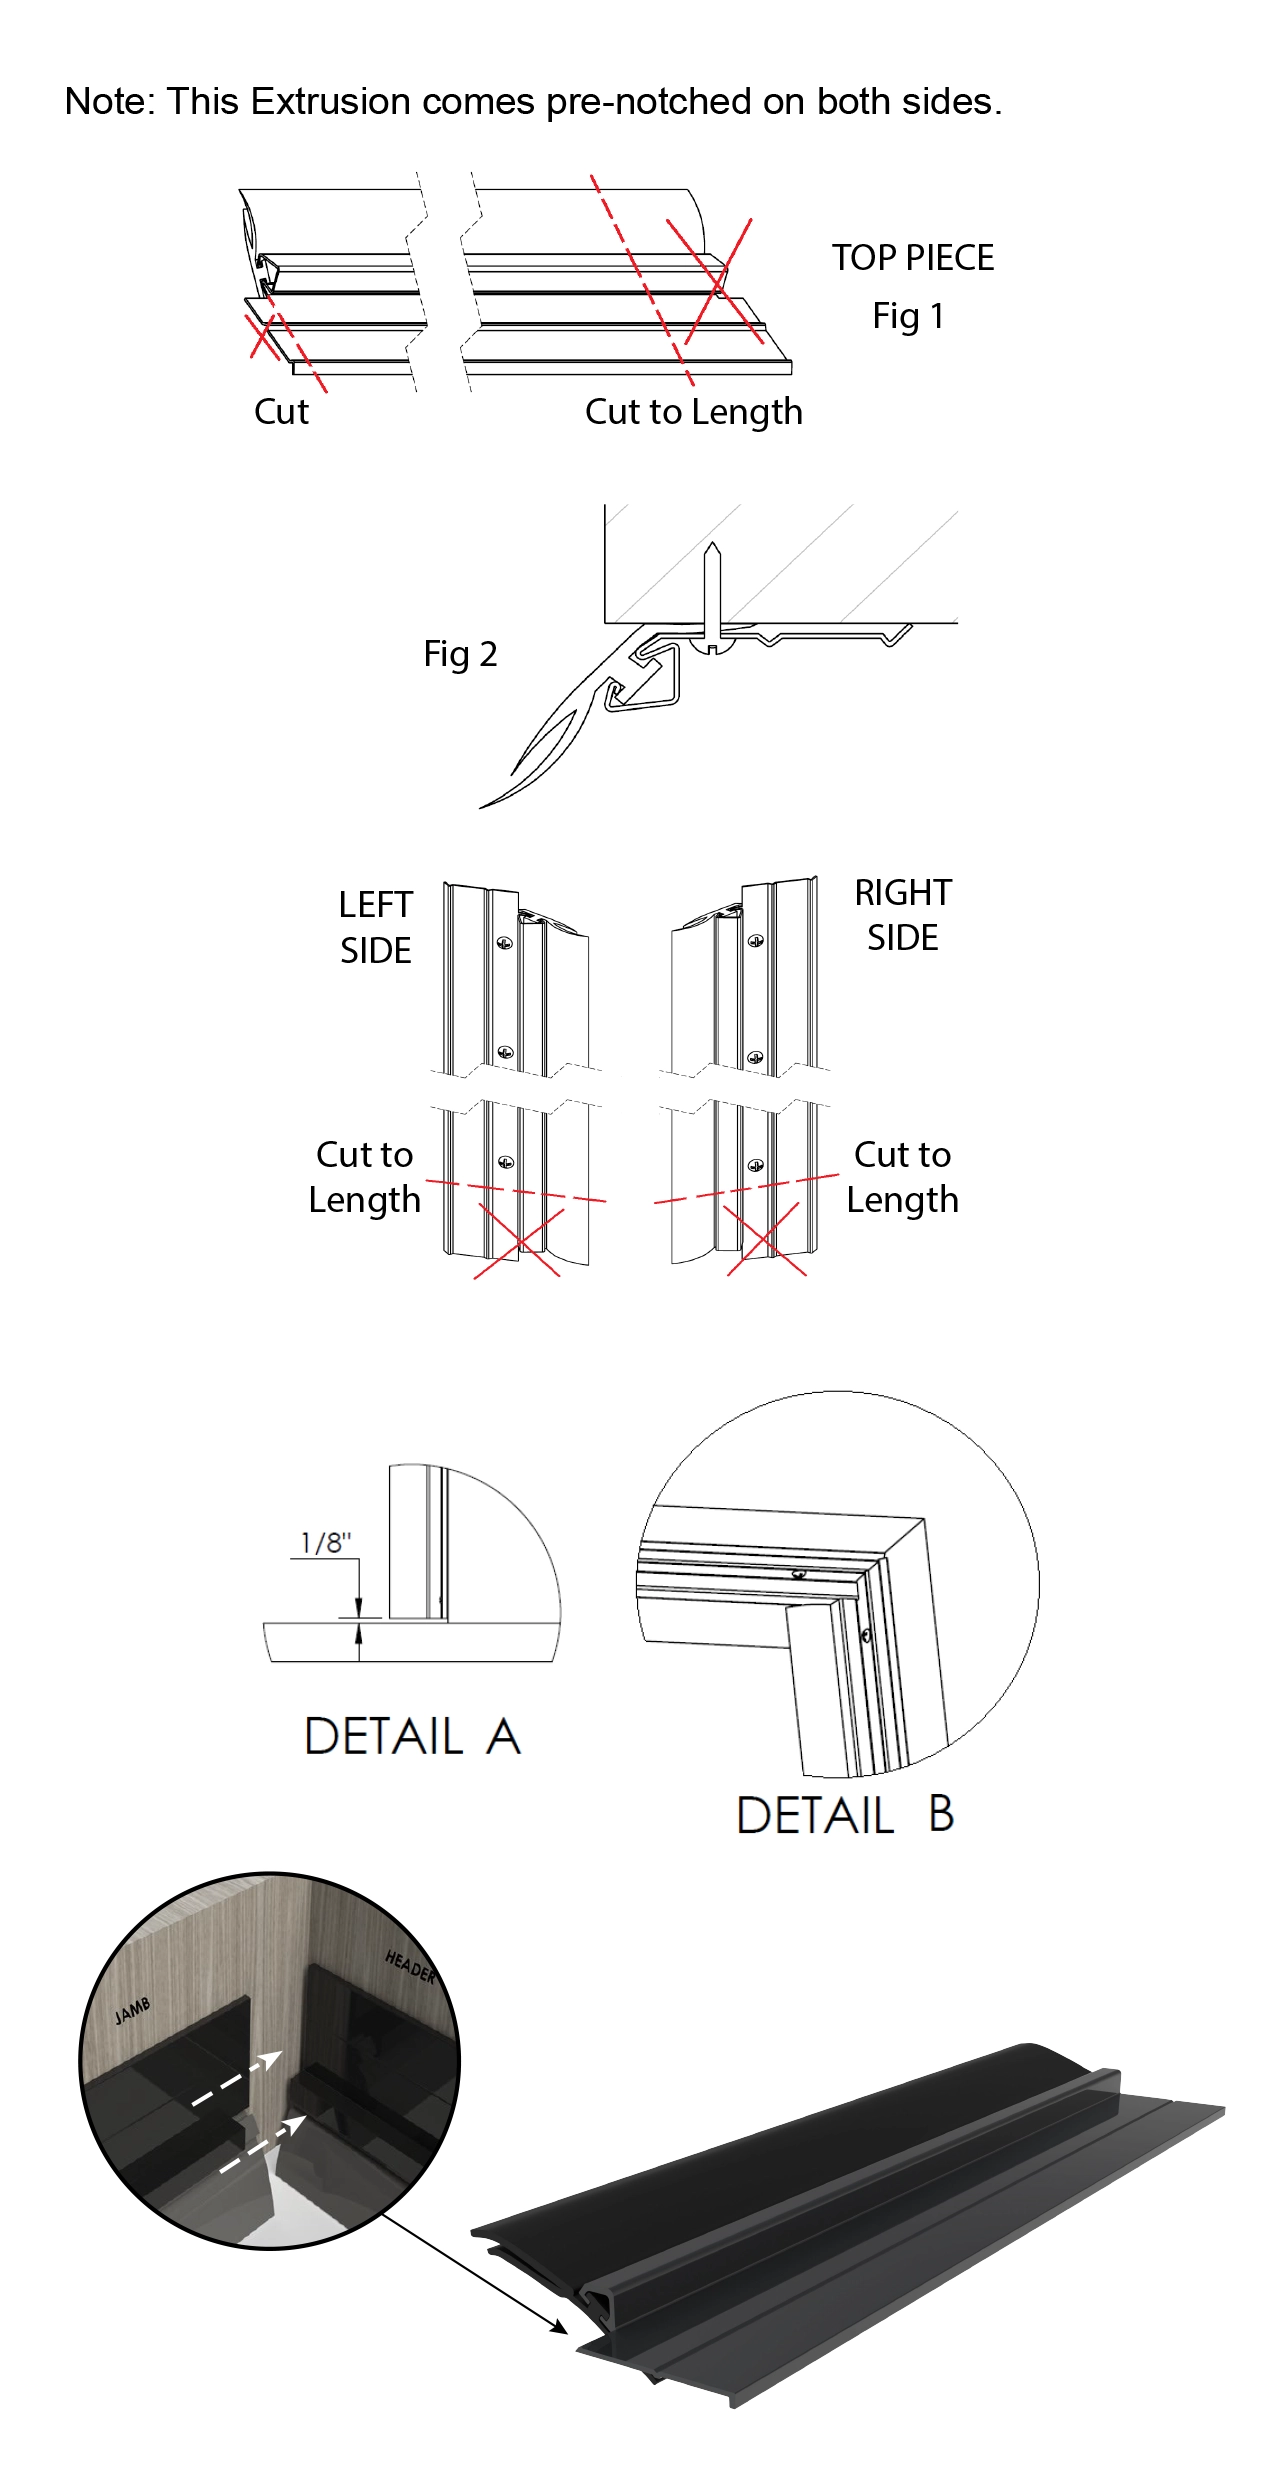
The Top Piece is Installed first.
(Fig 1) To prepare the Top Piece, cut a tab off the aluminum only on one end. Measure the header and cut the Top Piece to Length.
On one end of the Top Piece, pull the Vinyl 3” Forward and cut it off. The Vinyl will be stretched during installation.
(Fig 2) Install the Top Piece by using the screws provided as shown. Stretch the vinyl from jamb to jamb. Space screws approx 24” apart.
The Side Pieces are installed next.
(Fig 3) The Side Pieces have a notch on the top and bottom. Cut the Side Pieces to length by cutting from the bottom only. The notch will remain at the top. Be sure to cut one left, and one right. Cut to leave 1/8” gap to floor. (Detail A)
On the end with the notch pull the Vinyl 3” forward and cut off.
Install the Side Pieces by using the screws provided. Stretch the vinyl from top to bottom. For each side, use the screws in order: one screw at the top, one at
the bottom, and one screw where each of the door sections meet.
The Top and Sides should fit together in the corers as shown (Detail B)


